文章介绍了在Vue 3中使用print-js组件实现打印操作的步骤,包括安装依赖、创建打印组件和处理打印预览界面,文章还提到打印预览界面的样式调整对打印效果的影响,并展示了HTML展示和打印预览效果,最后,文章鼓励读者继续浏览相关文章并支持图小雯知识
第一步:安装依赖
yarn add print-js
第二步:创建打印组件:PrintHtmlComp.vue
<template><div id="printArea_123456789"><!-- 默认插槽,传入打印内容 --><slot></slot></div></template><script setup lang="ts">import printJs from 'print-js';defineOptions({ name: 'PrintHtmlComp' });const props = defineProps({fontSize: {type: Number,default: 14,required: false,},});const handlePrint = () => {printJs({printable: 'printArea_123456789', // 打印区域的idtype: 'html',scanStyles: true,targetStyles: ['*'], // 使用dom的所有样式,很重要font_size: props.fontSize + 'px', // 字体大小 --很重要,这里字体要和css中字体大小保持一致,默认是16px});};defineExpose({ handlePrint });</script>第三步:处理打印预览的界面 PrintPop.vue
这个界面的的样式调整直接关系到打印的样式的,即想要打印什么样的效果就在这个界面怎么调试。
<el-dialog v-model="state.dialogVisible" :destroy-on-close="true" :title="state.title" width="780px" @close="close"><PrintHtmlComp ref="printRef"> <!---这里是想要打印的--><div style="font-size: 20px">HELLO WORLD</div><div style="font-size: 20px">HELLO WORLD</div><div style="font-size: 20px">HELLO WORLD</div><div style="font-size: 20px">HELLO WORLD</div><div style="font-size: 20px">HELLO WORLD</div><div style="font-size: 20px">HELLO WORLD</div><div style="font-size: 20px">HELLO WORLD</div></PrintHtmlComp><template #footer><el-button @click="close">取 消</el-button><el-button :loading="state.saveLoading" type="primary" @click="handlePrint">打 印</el-button></template></el-dialog><script lang="ts" setup>import { reactive, ref } from 'vue';defineOptions({ name: 'WorkApplyPlanPrint' });const state = reactive({dialogVisible: false,});const showEdit = async () => {state.dialogVisible = true;};const close = () => {state.dialogVisible = false;};// 打印功能的函数const handlePrint = async () => {printRef.value?.handlePrint();};defineExpose({ showEdit });</script> HTML展示效果

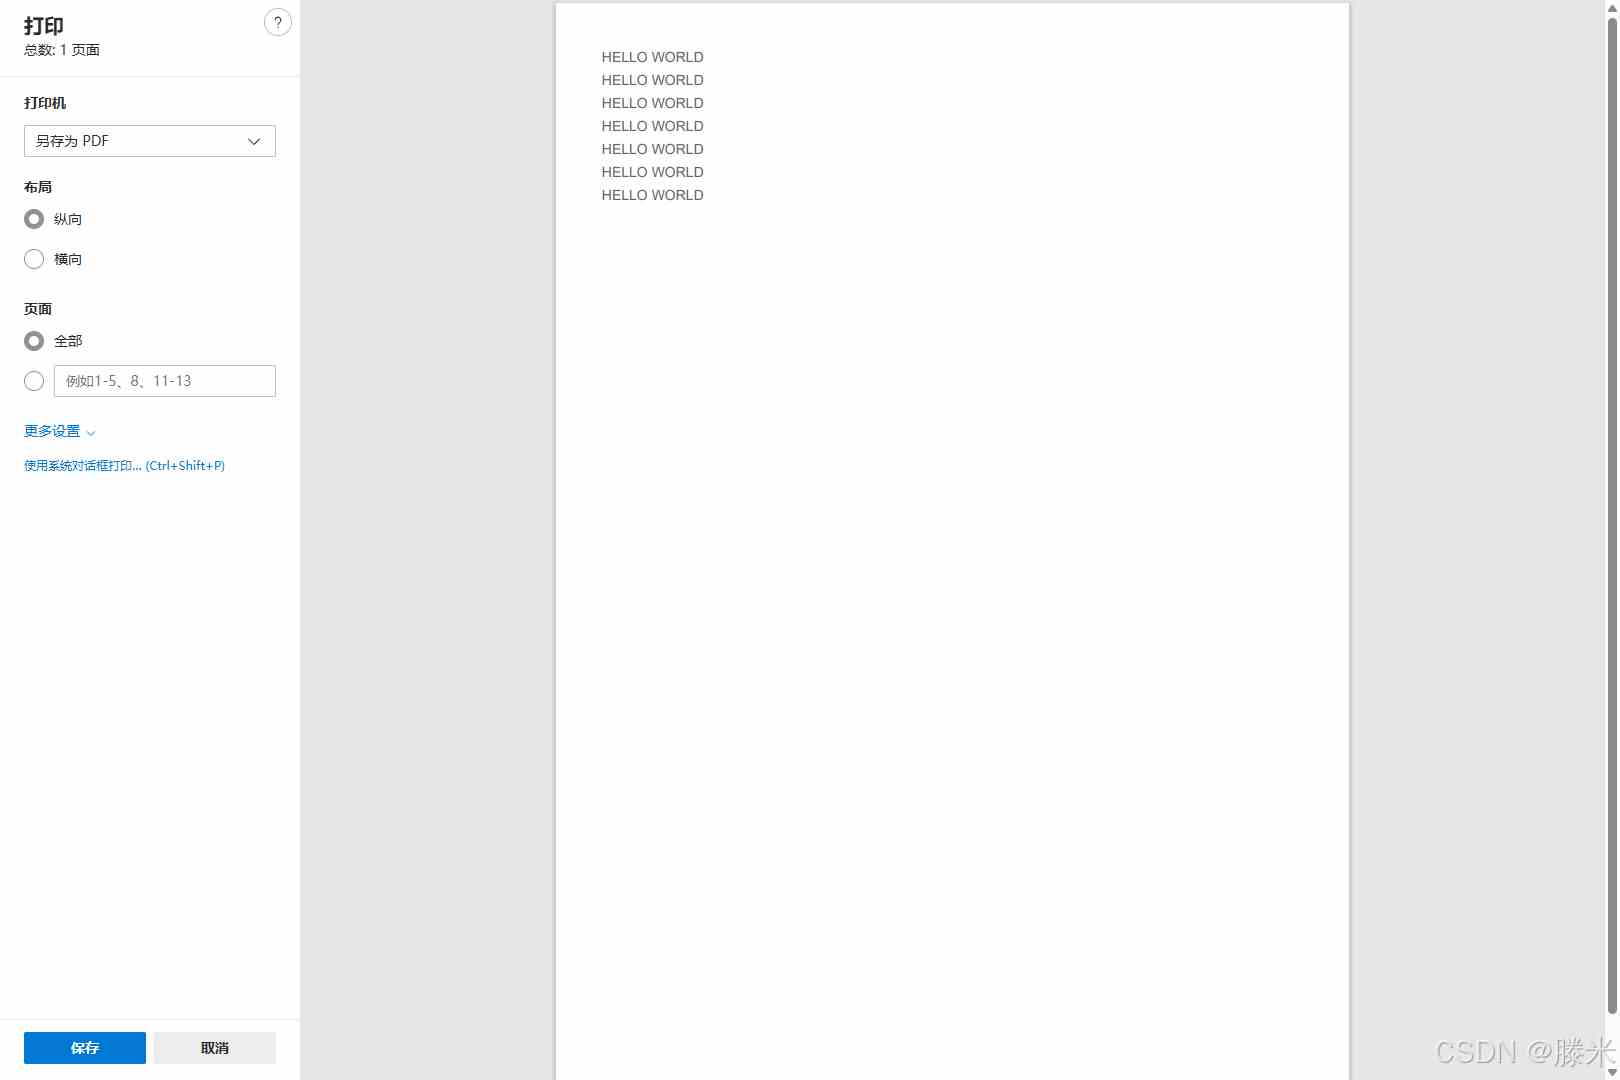
打印预览效果:
完成,功德+1。
关于遇到的问题以及解决方法,后续更新!!!!
")
")
")
")